Overview
Understanding the concepts of the design, teach, and learn sections in Allele is very important. Further, understanding when to use each section is critical as you work your way through authoring, teaching, and learning within the system.
Definitions
You can find baseline definitions for each concept in our “Reference” documentation seen on the left navigation. Taking a moment to review each of the concepts will help you get a better understanding of the primary purpose of each section.
The bigger picture
As mentioned above, each section of the system plays an important part in facilitating the entire workflow from creation of content to getting students engaged.
Design
Design is where you build. If you are creating new content, or adjusting existing content, you will almost always want to be in design. By doing your content work here, you are ensuring that you always have a single gold-copy of your material that can then be easily deployed for students within different sections, or for future semesters.
You are an educator teaching 3 sections of the same course (Biology 101). You want 2 of the 3 sections (Sections A and B) to be using your gold-copy material to reflect exactly what is in your design space. However, for the 3rd section (Section C), you would like to add a couple supplementary phases to get the class back on track. You can add those extra phases directly in Section C’s teach space builder. By doing this directly in teach, Section A and B will not be impacted.
Once you have finished authoring or adjusting your design content, you will do a deployment. By deploying your design space, you effectively creating a copy of your content and turning it into a teach space where you can then begin to invite a roster of students, manage teams, set timing logistics, and engage your students by using live dashboards and other teaching tools.
See how to deploy your design space by clicking here.
Teach
Now that we’ve deployed our design space, and created or updated our teach space, we’re ready to get everything set up for students to begin.
Going from a newly deployed teach space, to actively teaching your course in Allele is simple. The steps you’ll want to take are:
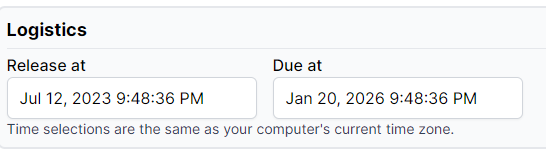
- Set each case’s logistics
- This can be completed by clicking “Edit” on each case and configuring the “Release at” and “Due at” dates. This will create the open and close date parameters.
- Add students to your roster
- Create team sets and teams
- Assign a team set to each case

Congrats! At this point, you have a teach space that students can begin to interact with - as long as they have been added to the roster and it is within the timeframe you configured for case logistics.
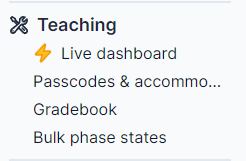
Once students have began interacting with your content, while you are in your teach space, you can use the Teaching tools on the left navigation pane to view student responses, manage accommodations, view the gradebook, and more!
Did You Know?
All student data flows into the Live teaching dashboard in real time. If you are facilitating a course, you can view student responses showing as they happen, which includes text input by the students. Watching students typing in real time has been described as “watching their thoughts unfold in real-time”.
Learn
The learn section of Allele is where students go to interact with the course material you have given them access to see. Your cases will show up for students as long as:
- The student has been added to the roster
- The current date is within the case’s “Release at” and “Due at” configured logistics
- The case’s “State” setting is “Published”
And in summary…
You do your authoring work in your design space.
When you are ready to teach a course, you will deploy your design space. Deploying your design space will generate a copy of that space and create a teach space where you can set logistics, add student rosters, and manage teams.
From there, students can log into Allele and access your content through the learn section!