Allele Orchestration Settings
Each phase can be tailored using different settings that control how and when students gain access to content, providing flexibility for both synchronous and asynchronous learning environments. Below is a detailed guide on how to use three key phase settings:
- Initially Locked
- Manually Unlock Phase
- Stay on Current Phase
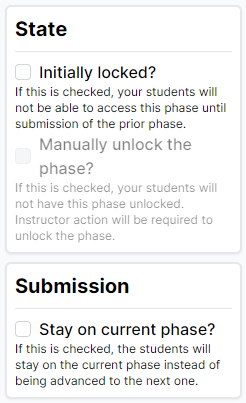
1. Initially Locked
- Description: This setting determines whether students can access a phase immediately or if it remains locked until the previous phase has been completed.
- Default Behavior: If checked, students will not be able to access the phase until they have submitted the prior phase.
- How it Works:
- If Initially Locked is enabled, the phase will remain inaccessible to students until they submit the previous phase.
- If Initially Locked is disabled, students will be able to access the phase right away, regardless of whether they have completed the prior phase.
Scenario Example:
- Enabled: A professor is using Allele for a self-paced course. Each module builds upon the previous one, and students must complete one phase before moving to the next. By enabling “Initially Locked,” the system ensures students only move forward when ready.
- Disabled: In a workshop where students can explore different topics independently, selected phases are unlocked from the start, allowing students to jump between different phases at their own pace.
2. Manually Unlock Phase?
- Description: This setting adds an additional layer of control. When enabled, the instructor must manually unlock the phase, even if the prior phase has been submitted.
- Default Behavior: If enabled, this setting requires the instructor to take action to unlock the next phase, regardless of any automated triggers (such as phase submission).
- How it Works:
- Even after a student submits the previous phase, the next phase remains locked until the instructor manually unlocks it.
- If disabled, students will gain access to the phase once they complete the previous one, assuming no other restrictions (like Initially Locked) are in place.
Scenario Example:
- Enabled: In a research course, the instructor wants to review each student’s submission before allowing them to proceed to the next module. The “Manually Unlock Phase?” setting ensures the instructor retains control over when students advance.
- Disabled: In a self-assessment phase, students can immediately move forward upon completing their work without needing instructor intervention.
3. Stay on Current Phase?
- Description: This setting controls whether students automatically move to the next phase after submitting their work.
- Default Behavior: If this setting is disabled, students will be automatically moved to the next phase (provided it’s unlocked).
- How it Works:
- If enabled, students will remain on the current phase after submission. They will not be directed to the next phase until they manually navigate there or an instructor unlocks it.
- If disabled, students will automatically be directed to the next phase, unless there are other locks in place (e.g., Initially Locked or Manually Unlock Phase?).
Scenario Example:
- Enabled: An instructor wants students to reflect on their submitted work before moving forward. By enabling “Stay on Current Phase,” students can review their submissions and won’t automatically progress to the next phase.
- Disabled: The instructor wants students to move sequentially through the phases without enforcing review. By disabling this setting, students automatically move forward upon submitting their work.
Allele tip
While you read through the example scenarios, remember that these settings are configured per phase. Which means that you could even combine different scenarios all within a single case. For instance, you may want the first half of a case a self-paced and asynchronous (scenario #1), while the second half the of case is instructor-guided and synchronous (scenario #3).
Combining Settings: Example Scenarios
Scenario 1: Self-Paced Course with Automatic Progression
- Settings:
- Initially Locked: Enabled
- Manually Unlock Phase?: Disabled
- Stay on Current Phase?: Disabled
- Behavior: Each phase is locked until the previous phase is submitted. Once a student submits a phase, they are automatically moved to the next phase. The instructor does not need to intervene, making this ideal for self-paced courses.
Scenario 2: Instructor-Guided Course with Review Process
- Settings:
- Initially Locked: Enabled
- Manually Unlock Phase?: Enabled
- Stay on Current Phase?: Enabled
- Behavior: Each phase remains locked until the previous one is completed. However, even after submission, the instructor must manually unlock the next phase. Students remain on the current phase until the instructor approves their progression. This setup is perfect for courses where the instructor wants to closely monitor progress and provide feedback before students move ahead.
Scenario 3: Open Exploration Workshop
- Settings:
- Initially Locked: Disabled
- Manually Unlock Phase?: Disabled
- Stay on Current Phase?: Disabled
- Behavior: All phases are unlocked from the beginning. Students can freely move between phases, and once they submit a phase, they are automatically moved to the next one. This approach works well in courses that encourage exploration and independent learning.
Summary of Key Settings
| Setting | Enabled Behavior | Disabled Behavior |
|---|---|---|
| Initially Locked | Phase is locked until the previous phase is submitted. | Phase is unlocked and accessible immediately. |
| Manually Unlock Phase? | Instructor intervention is required to unlock the phase, even after submission of the prior phase. | Phase unlocks automatically when the previous phase is submitted. |
| Stay on Current Phase? | Students remain on the current phase after submission. They are not redirected to the next phase. | Students are automatically moved to the next phase after submission, unless a locking mechanism prevents it. |
This guide provides flexibility for setting up your courses based on your instructional goals. Experiment with these settings to find the right balance for your teaching style and student needs.